CityHome Project, MIT Media Lab
Omnipresent in home computing interface. Primary interface to CityHome project.
I started working on the CityHome project when I decided to join Hasier Larrea as an Undergraduate Researcher at the Media Lab’s Changing Places group, headed by Kent Larson. I was drawn to the project because it promised me the opportunity to learn about electronics as well as work on software.
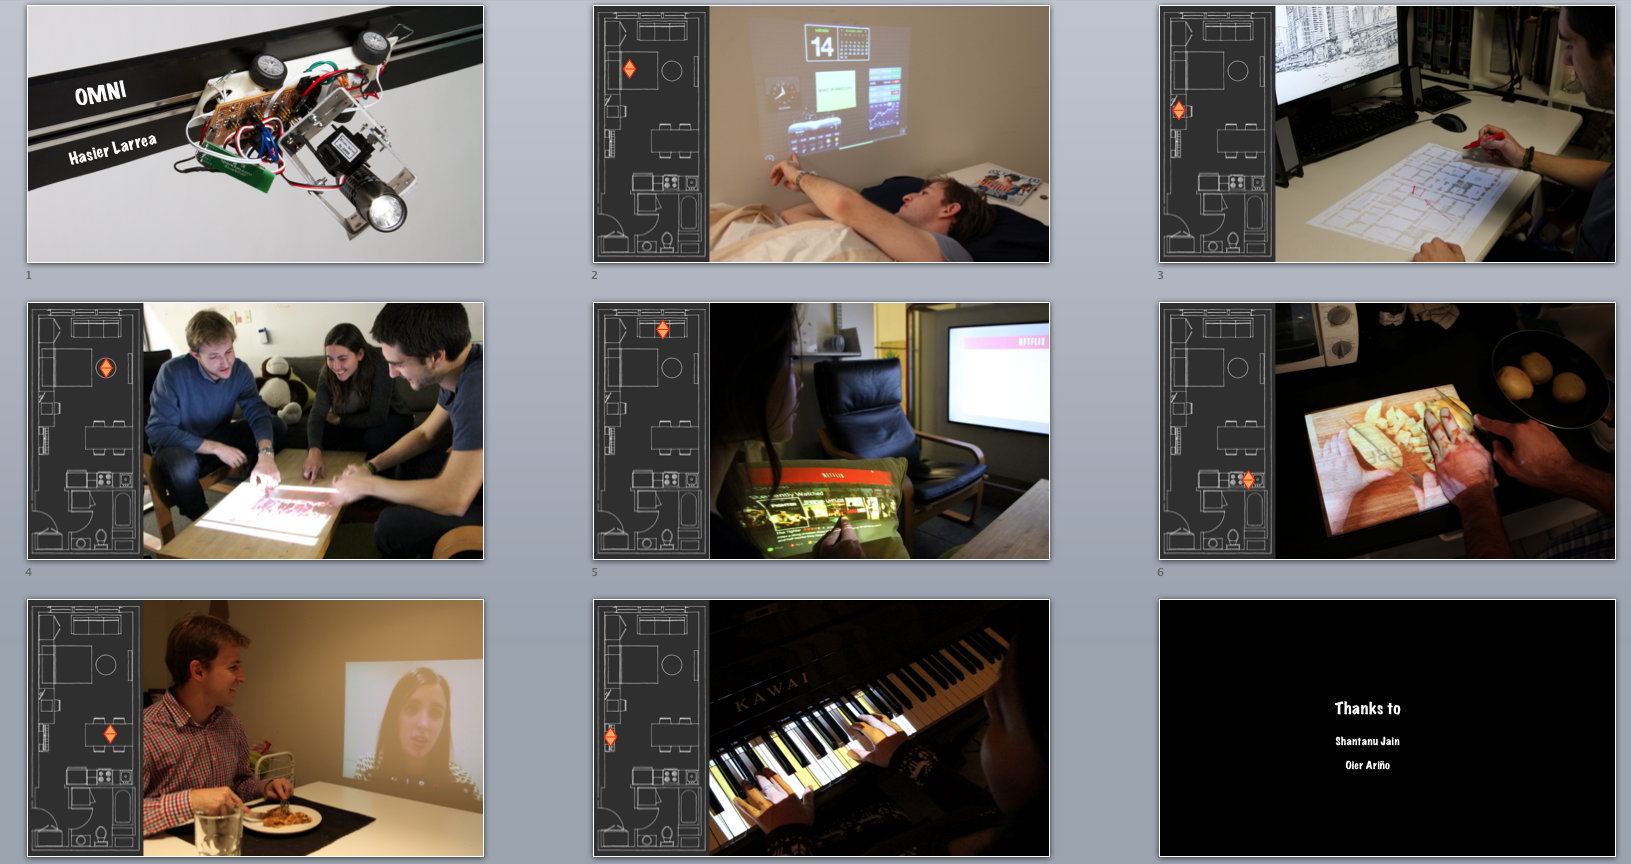
My subproject – the omnipresent in-home computing interface – falls under the larger CityHome Project. CityHome attempts to solve the problem of rising rents in cities by using a small floorplan apartment as a multifunctional space. By applying mechatronics to the apartment’s walls and furnishings, the apartment could rearrange itself based on the residents’ requirements at the time. The apartment could turn into a dining room for 12, or two small bedrooms when you have guests, or into a spacious office.
But even with this ‘digital’ apartment, how would the resident control it? We had the hardware, but what about the software and UI to control it? Beyond the UI/UX of the project, the home of the future needed a vision for computing in this new environment. I quickly realized that these problems were one in the same – the most natural way to interact with your home would be through your home computing interface.
I began with envisioning a home where every surface was interactive. Turning the whole floor into an interactive display would allow the user to visualize floor plans in real space. Turning every wall into a display would allow you to compute wherever you were – on the couch, in bed, or in the kitchen cooking. Turning a table into a display would allow you to collaborate with guests. But the implementation of such a system would be quite expensive – at least 6 high resolution projectors would be required per small apartment.
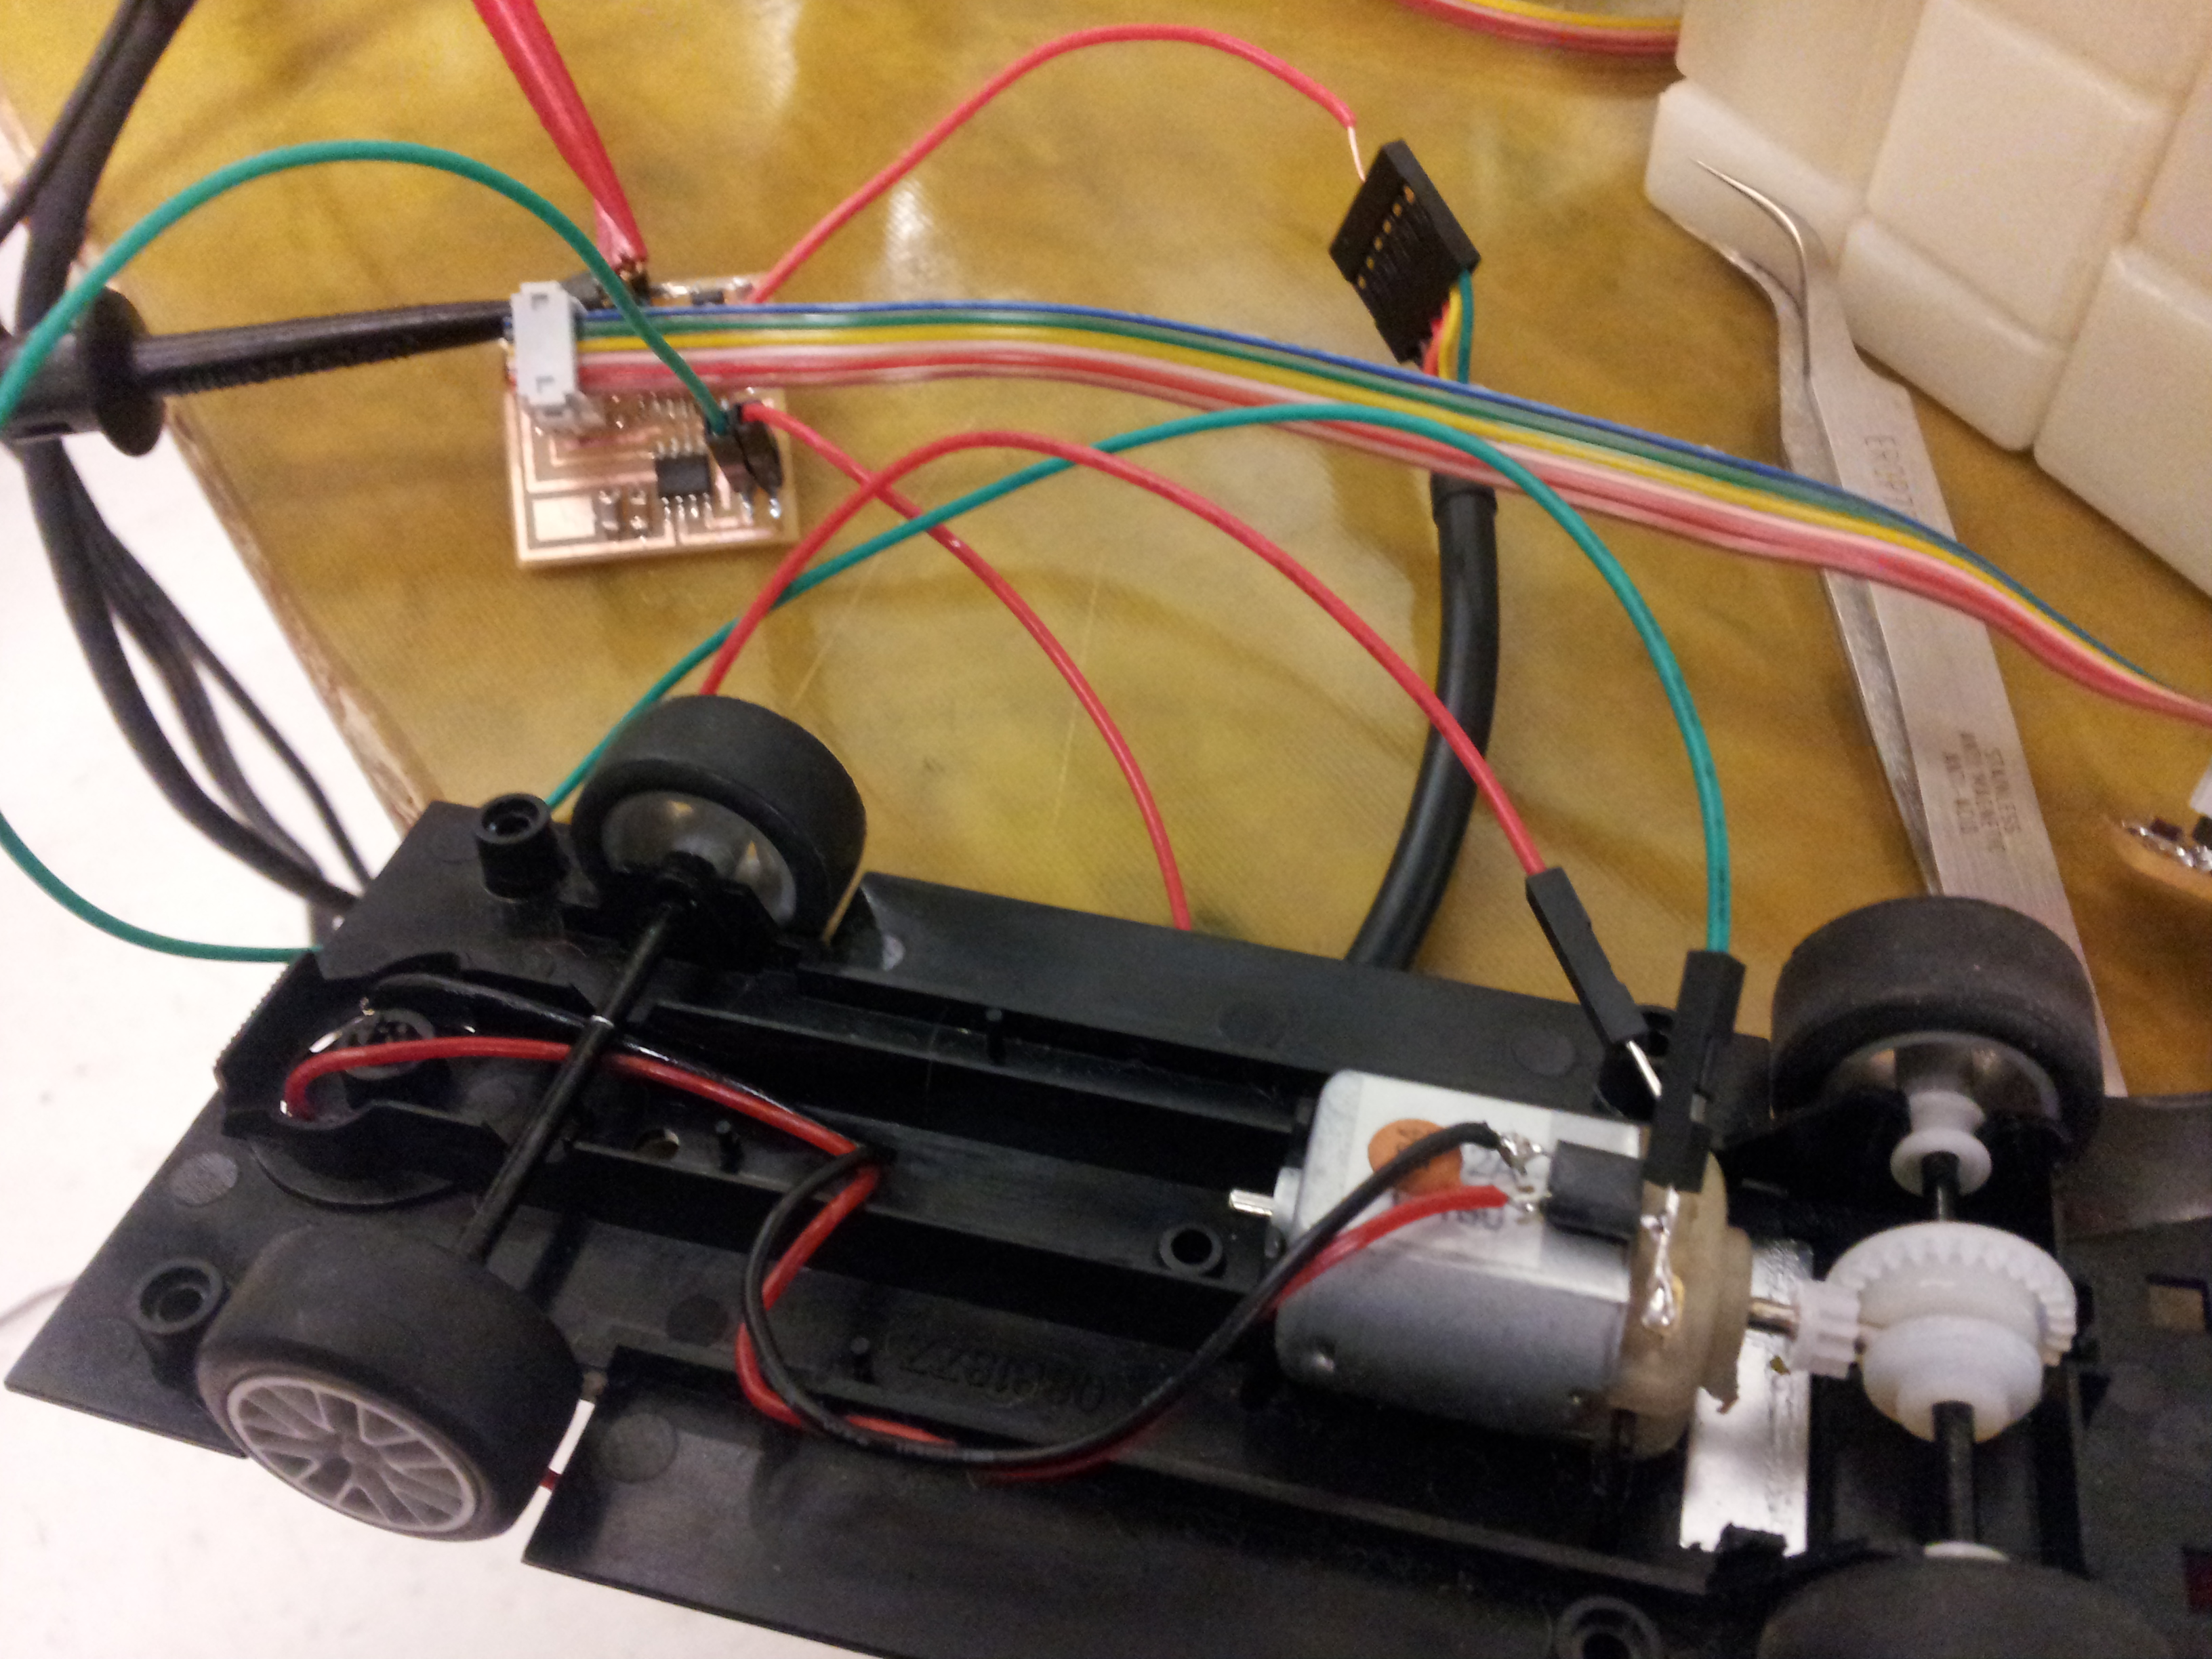
Hasier and I realized a cost-effective implementation would be to have a projector-camera-computer unit that would travel to your location and automatically adjust. In true Media Lab style, we started to develop a prototype right away. We got a slot car kit to hack on. Slot cars are incredibly simple – the two rails provide current to the motor in the car, which spins the wheels. The car’s speed is controlled by a controller, which is basically a resistor between the power source and the power rail.

My first step was to control the direction of the car by adding an Arduino controlled H-Bridge to the car’s motor. The H-Bridge was a TI L293 quadruple half H bridge unit. I controlled the direction by typing in commands into the serial terminal.
I then added a Bluetooth control unit, connected to the Tx/Rx pins of the Arduino. Basically it simulated the serial connection over Bluetooth. I first worked with the Bluetooth unit by using the *nix screen terminal program. It was pretty neat to see the arduino working that way.
At this point, the motor was still being powered by the Arduino, which was being powered via USB by the computer. I figured if we could take the input voltage from the track and transform it to 5V then we could power the whole car from the track itself – incredibly elegant. The electronic component to use is a VReg (voltage regulator). We got this working as well.
Because of his class requirement, Hasier had to build an Arduino essentially just from the Atmel chip. So he created a custom PCB with just the components we needed and soldered all the components onto the board himself. He first tried out the VReg on that board.
We attached two servos and a mount to the car, to which we envisioned the projector and camera being attached. I programmed these servos to do a simple full rotation. I never totally figured out how to program these servos – I think they were continuous servos, not true position based servos.
Next, we needed some kind of position sensing system, so the car could drive to a specific location and stop. We first talked about adding in a simple Hall-Effect sensor and embedding magnets in the tracks. But there were two problems with this approach – I couldn’t get the Hall Effect sensor to work properly, and secondly, each point would have to be hardcoded. The car could easily get lost if it missed sensing any particular magnet.
We then tried to implement an RFID based system. We would attach RFID stickers to the track, and have the reader on the car. Each RFID tag was unique, so we could build a mapping between tag codes and different locations. This seemed to be the optimal solution. But the car was so fast, that the reader couldn’t read the tags. At this point, we were running out of time before the end of the semester, so we moved onto the next solution.
Hasier implemented a solution where he used another Hall Effect sensor with a very strong magnet. The demo track was a simple linear section, with magnets at the 1/3rd and 2/3rd positions. The car stopped whenever it sensed a magnet. I wasn’t that satisfied with the solution, but at least it worked for the demo.
Finally, I made a web interface to control the car. It’s use was quite simple – a webpage with all the basic commands of the car as buttons. When these buttons were pressed, the python backend received the request and wrote the correct message over the serial terminal. The buttons were implemented with AJAX so the page acted like a ‘control panel’ app.
On top of this simple backend infrastructure, I used Annyang.js to add in voice recognition functionality. It’s quite simple to implement, but its performance is dependent on how much background noise occurs when you’re speaking.
In the end, our little car was able to drive to either location given a voice command. It then swiveled its servos. Wow, a lot work for such a seemingly simple result. But overall, a very fun project. Hopefully I can get it posted on Hackaday someday.
